DIY Camping Lantern

Making a simple DIY lantern while camping can be a fun and practical activity that is perfect for all ages. Here’s a great method to create a camping lantern using a few basic materials:
Materials you’ll need:
- Empty and cleaned tin can (soup can or similar size)
- Hammer and nail or a drill with a small bit
- Wire or a coat hanger
- Candle or a battery-powered LED tea light
Instructions:
- Prepare the tin can: Make sure the tin can is empty, clean, and dry. Remove any paper labels and wash off any leftover adhesive.
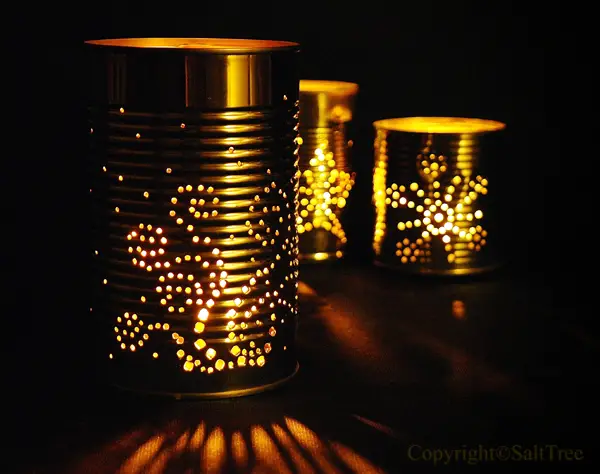
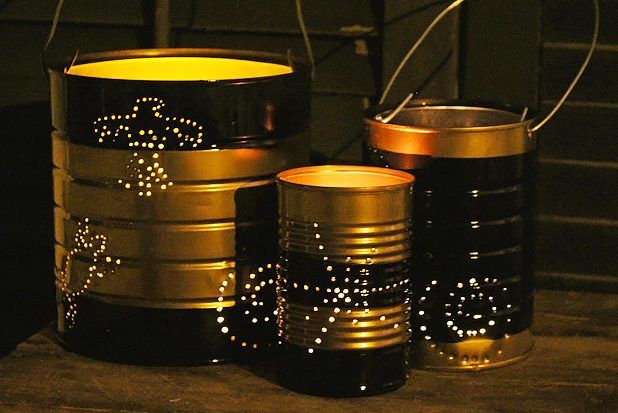
- Create ventilation holes: To allow air to circulate and prevent the candle from suffocating, you’ll need to create ventilation holes in the tin can. Using a hammer and nail or a drill with a small bit, carefully punch or drill several holes around the sides of the can, near the top. Space the holes evenly to ensure proper airflow.
- Make a handle: Cut a piece of wire or use a coat hanger to create a handle for the lantern. Bend the wire into a loop and attach each end securely to opposite sides of the tin can near the top. The handle should allow you to hang the lantern or carry it easily.
- Insert the light source: If you have a battery-powered LED tea light, simply place it inside the tin can. If you’re using a candle, you can use a small amount of melted wax to secure the candle to the bottom of the can, making sure it stands upright.
- Test the lantern: Light the candle or turn on the LED tea light to test the lantern. Ensure the ventilation holes are providing enough air to keep the flame burning steadily.
- Hang or place the lantern: Depending on your preference, you can hang the lantern from a tree branch or a tent pole using the handle, or you can place it on a flat, stable surface.
Safety Tips:
- Always exercise caution when using an open flame, such as a candle, in or near your camping area. Keep the lantern away from flammable materials and never leave it unattended.
- If using a candle, be sure to extinguish it completely before going to bed or leaving the campsite.
- If using a battery-powered LED tea light, make sure you have spare batteries in case the light runs out.
Pro Tip:
- The ventilation holes you created are perfect for allowing air to circulate. You can also get creative with the placement to create beautiful designs in your lantern. See examples below.


This DIY camping lantern is a simple and fun project that can provide cozy and ambient lighting for your camping adventures. However, it’s essential to prioritize safety and follow proper fire safety guidelines when using any type of open flame in a camping setting. Come visit any of our Kiefer Campgrounds today to show off your new lanterns!
Family owned and operated, Kiefer Campgrounds strive to offer you the best rates for a comfortable location with outstanding service, and spotless facilities. When you stay in one of our parks, you are no longer just a happy camper, but a part of our family! We are most certain you will enjoy your stay with us. Pick your favorite location and book your spot now before it’s too late! You’ll be happy you did!


